How to Waterproof Your Bathroom Cabinets on a Budget
Waterproof bathroom cabinets are one of the most requested features I help homeowners achieve. As a bathroom designer with years of hands-on experience, one of the most common questions I get asked is: “How do I waterproof my bathroom cabinets without spending a fortune?” If you’ve asked the same question, you’re in the right place.
Moisture is the silent enemy of every bathroom cabinet. It warps wood, peels paint, and creates the perfect environment for mold. The good news? You don’t need to gut your space or blow your budget to stop it. In this guide, I’ll show you exactly how to make bathroom cabinets waterproof using affordable methods, materials, and products—many of which you can do yourself!
Why Waterproof Bathroom Cabinets Matter
Let’s be real. Your bathroom is the wettest room in your home. Water splashes from sinks, humidity from showers, and even cleaning products can wreak havoc on your cabinets. That’s why knowing how to protect bathroom cabinets is essential for every homeowner.
Whether you’re remodeling or maintaining your current setup, learning how to waterproof your bathroom cabinets can save you from costly replacements down the line.
How to Make Bathroom Cabinets Waterproof: Step-by-Step Guide
Step 1: Choose Moisture-Resistant Materials
Before sealing anything, consider the material of your cabinet. Some materials naturally handle water better than others.
- Waterproof wood for bathroom walls and cabinets like marine plywood or PVC board are great long-term investments.
- Avoid MDF in high-moisture zones unless it’s been treated.
If you’re wondering how to save money on bathroom cabinets, go for budget-friendly but moisture-resistant laminates or thermofoil finishes.
Step 2: Seal Every Surface
What to seal bathroom cabinets with? Here’s what I recommend:
- Polyurethane: A clear, durable finish for wooden surfaces. Apply 2–3 coats.
- Silicone caulk: Use around the base and seams to prevent water from sneaking in.
- Edge banding: If your cabinets are laminate or particleboard, seal exposed edges with banding tape to avoid swelling.
Knowing what a good sealer for cabinets is will drastically improve their lifespan. Look for products labeled “waterproof,” “moisture-resistant,” or “marine-grade.”
Step 3: Apply a Waterproof Paint or Finish
For painted wood cabinets, always use waterproof or moisture-resistant paint. You can:
- Start with a primer for waterproofing wood
- Apply a waterproof enamel or epoxy-based paint
- Finish with a clear waterproof sealant
That’s how to permanently waterproof wood in bathrooms!
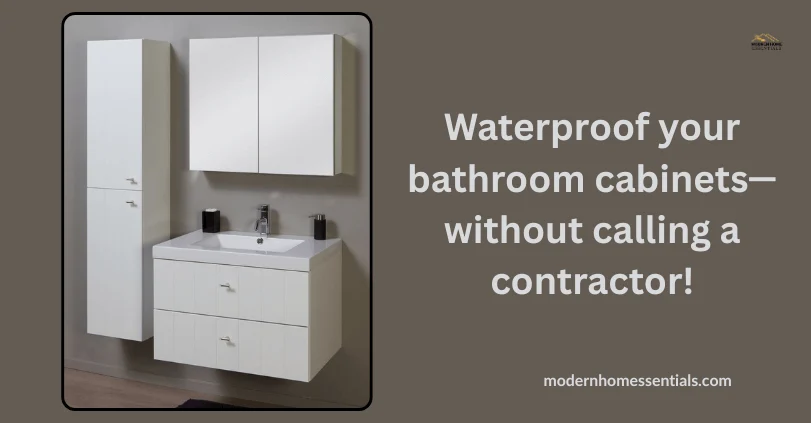
Step 4: Install a Waterproof Bathroom Wall Cabinet
If you’re remodeling or replacing, consider installing a waterproof bathroom wall cabinet made from PVC or stainless steel. These don’t just resist water—they laugh in its face!
And yes, these are great options if you’re thinking, “Can I DIY waterproof bathroom upgrades myself?” Absolutely.
Step 5: Protect the Cabinet Base from Water
A common mistake? Ignoring the bottom. Here’s how to weatherproof cabinets from below:
- Use cabinet feet risers to lift off the floor
- Add rubber mats under the base
- Apply silicone sealant along the bottom seams
Step 6: Improve Airflow to Prevent Moisture Buildup
Waterproofing isn’t just about stopping water—it’s also about removing trapped moisture.
Here’s how to remove moisture from a cabinet:
- Keep cabinet doors slightly open after showers
- Add small moisture absorbers or silica packs inside
- Install a bathroom exhaust fan
Want to go the extra mile? Add a ventilation grid at the back of the cabinet.
How to Protect Kitchen Cabinets from Water
While we’re talking cabinets, many people also ask me how to protect kitchen cabinets from water—especially under the sink.
Use the same approach:
- Seal the wood
- Use waterproof liners
- Apply silicone caulking around edges
Don’t forget to check for leaks regularly. Prevention is the cheapest waterproofing trick of all!
Waterproofing Bathroom Cabinets on a Budget: Pro Tips
1. DIY vs. Professional Help
Yes, you can do most of this yourself. If you’re asking, “Can I DIY waterproof bathroom cabinets?”—the answer is a solid YES.
Save labor costs by:
- Sealing with off-the-shelf waterproofing kits
- Watching tutorials on applying varnish and caulk
- Using painter’s tape for clean paint/sealant lines
2. Budget-Friendly Waterproof Materials
Here are affordable picks I often recommend:
- PVC or vinyl cabinets: Pre-made and waterproof by design
- Marine plywood: Great strength and moisture resistance
- Peel-and-stick waterproof film: Easy to install on cabinet doors
Waterproof Cabinet Maintenance Tips
Once you’ve sealed and protected everything, keep it that way!
- Wipe spills immediately
- Keep vents or exhausts running when showering
- Reapply sealant once a year
- Check hinges and joints regularly
Learning how to protect bathroom cabinets isn’t a one-time job—it’s a habit.
FAQs: Waterproof Bathroom Cabinets
Q1: How to make a bathroom cabinet waterproof in a rental?
Use peel-and-stick waterproof contact paper, rubber mats, and moisture absorbers—all removable and landlord-friendly.
Q2: What to seal bathroom cabinets with for best results?
Use polyurethane or marine-grade varnish. For edges, use silicone sealant.
Q3: Can I install a waterproof bathroom wall cabinet myself?
Yes! Look for pre-assembled PVC or vinyl models. Most come with simple mounting brackets.
Q4: How to remove moisture from a cabinet permanently?
Use passive moisture absorbers or install a cabinet vent. Improve room ventilation.
Q5: How to permanently waterproof wood?
Use marine-grade sealants or epoxies, followed by 2–3 coats of waterproof finish.
Final Thoughts: Make It Waterproof, Make It Last
Waterproofing your bathroom cabinets doesn’t have to cost a fortune—or require a contractor. With a bit of DIY spirit, the right materials, and a solid weekend plan, you can protect your cabinets and extend their life by years.
So next time someone asks, “How to waterproof bathroom cabinets on a budget?”—you’ll know exactly what to say.
You’ve got this—and your cabinets will thank you!

